Flipper Zero Firmware
Loading...
Searching...
No Matches
Reading logs via the Dev Board

The Developer Board allows you to read Flipper Zero logs via UART. Unlike reading logs via the command-line interface (CLI), the Developer Board enables you to collect logs from the device directly to a serial console independently from the operating system of Flipper Zero. It allows you to see the device's logs when it's loading, updating, or crashing. It's useful for debugging and troubleshooting during software development.

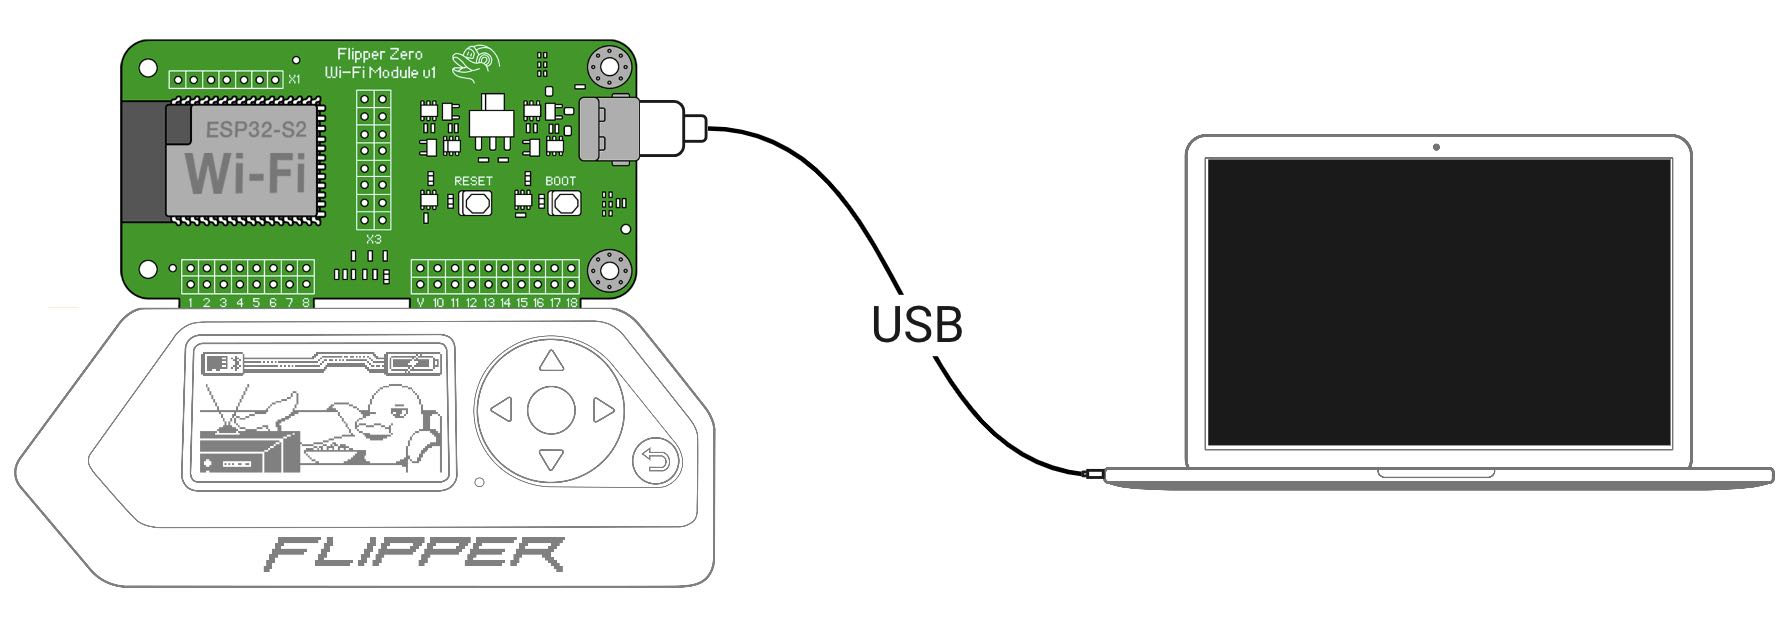
NOTE: Flipper Zero logs can only be viewed when the developer board is connected via USB. The option to view logs over Wi-Fi will be added in future updates.


Setting the log level

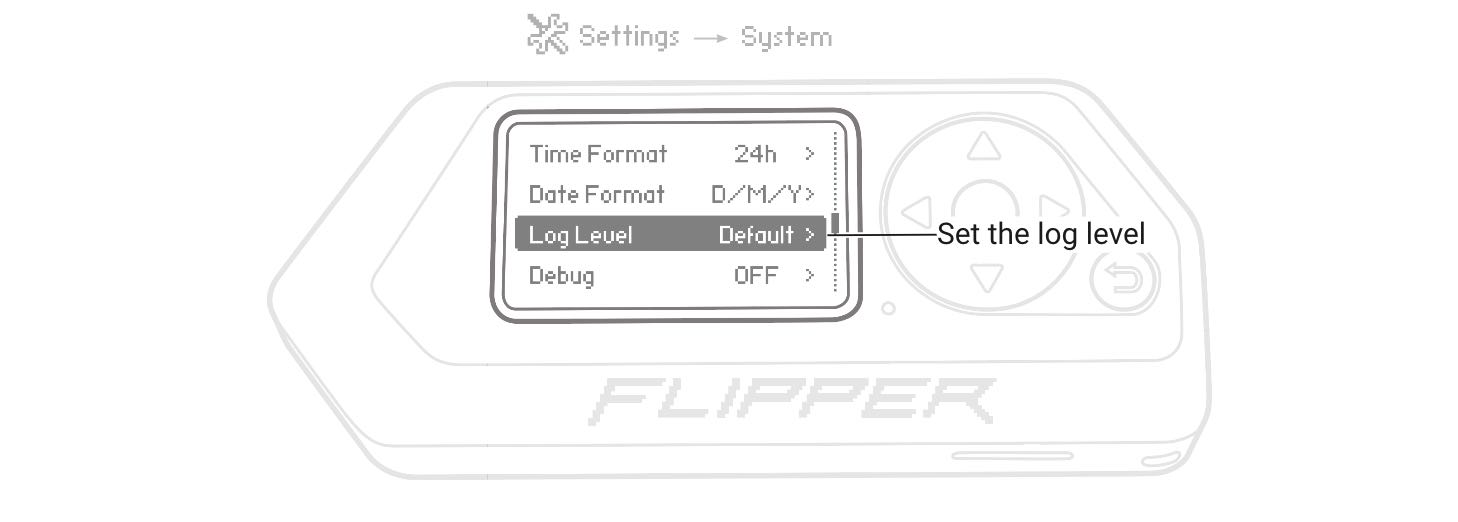
Depending on your needs, you can set the log level by going to Main Menu -> Settings -> Log Level. To learn more about logging levels, visit Settings.

You can manually set the preferred log level


Viewing Flipper Zero logs

Depending on your operating system, you need to install an additional application on your computer to read logs via the Developer Board:

MacOS

On MacOS, you need to install the minicom communication program by doing the following:

  1. Install Homebrew by running the following command in the Terminal:

    /bin/bash -c "$(curl -fsSL https://raw.githubusercontent.com/Homebrew/install/HEAD/install.sh)"
  2. After installation of Homebrew, run the following command to install minicom:

    brew install minicom

After installation of minicom on your macOS computer, you can connect to the Developer Board to read Flipper Zero logs by doing the following:

  1. Cold-plug the Developer Board into your Flipper Zero by turning off the Flipper Zero, connecting the developer board, and then turning it back on.
  2. On your computer, open the Terminal and run the following command:

    ls /dev/cu.*

    Note the list of devices.

  3. Connect the developer board to your computer using a USB Type-C cable. Connect the developer board with a USB-C cable
  4. Rerun the command. Two new devices have to appear: this is the Developer Board.

    /dev/cu.usbmodemblackmagic1
    /dev/cu.usbmodemblackmagic3

    Your Developer Board might have different names.

  5. Run the following command:

    minicom -D /dev/<port> -b 230400

    Where <port> is the name of your device with a bigger number.

    Example:

    minicom -D /dev/cu.usbmodemblackmagic3 -b 230400
  6. View logs of your Flipper Zero in the Terminal.
  7. To quit, close the minicom window or quit via the minicom menu.

Linux

On Linux, you need to install the minicom communication program. For example, on Ubuntu, run in the Terminal the following command:

sudo apt install minicom

After installation of minicom on your Linux computer, you can connect to the Developer Board to read Flipper Zero logs by doing the following:

  1. Cold-plug the Developer Board into your Flipper Zero by turning off the Flipper Zero, connecting the developer board, and then turning it back on.
  2. On your computer, open the Terminal and run the following command:

    ls /dev/tty*

    Note the list of devices.

  3. Connect the developer board to your computer using a USB Type-C cable. Connect the developer board with a USB-C cable
  4. Rerun the command. Two new devices have to appear: this is the Developer Board.

    /dev/ttyACM0
    /dev/ttyACM1

    Your Developer Board might have different names.

  5. Run the following command:

    minicom -D /dev/<port> -b 230400

    Where <port> is the name of your device with a bigger number.

    Example:

    minicom -D /dev/cu.usbmodemblackmagic3 -b 230400
  6. View logs of your Flipper Zero in the Terminal.

    NOTE: If no logs are shown in the Terminal, try running the command from Step 5 with another device name.

  7. To quit, close the minicom window or quit via the minicom menu.

Windows

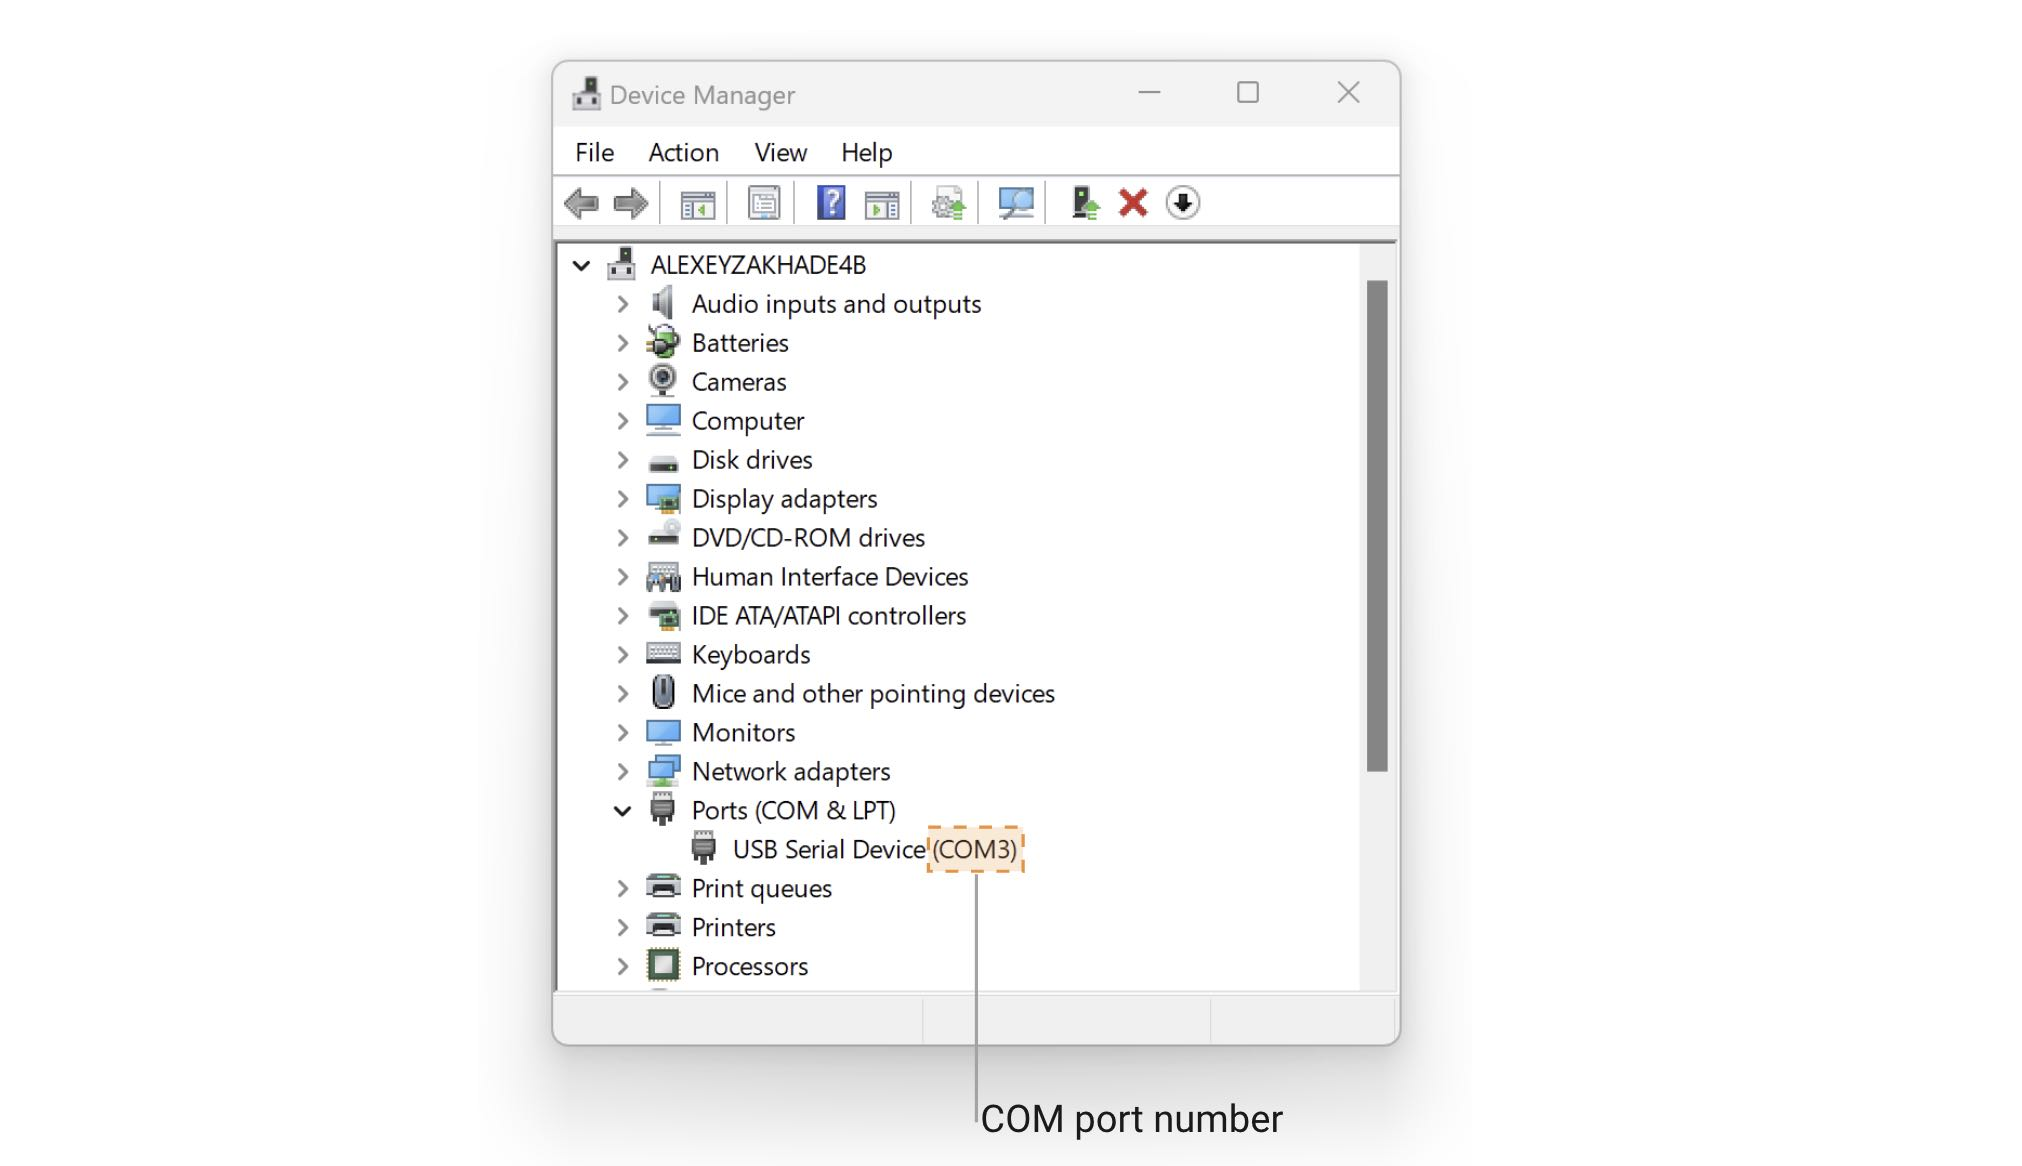
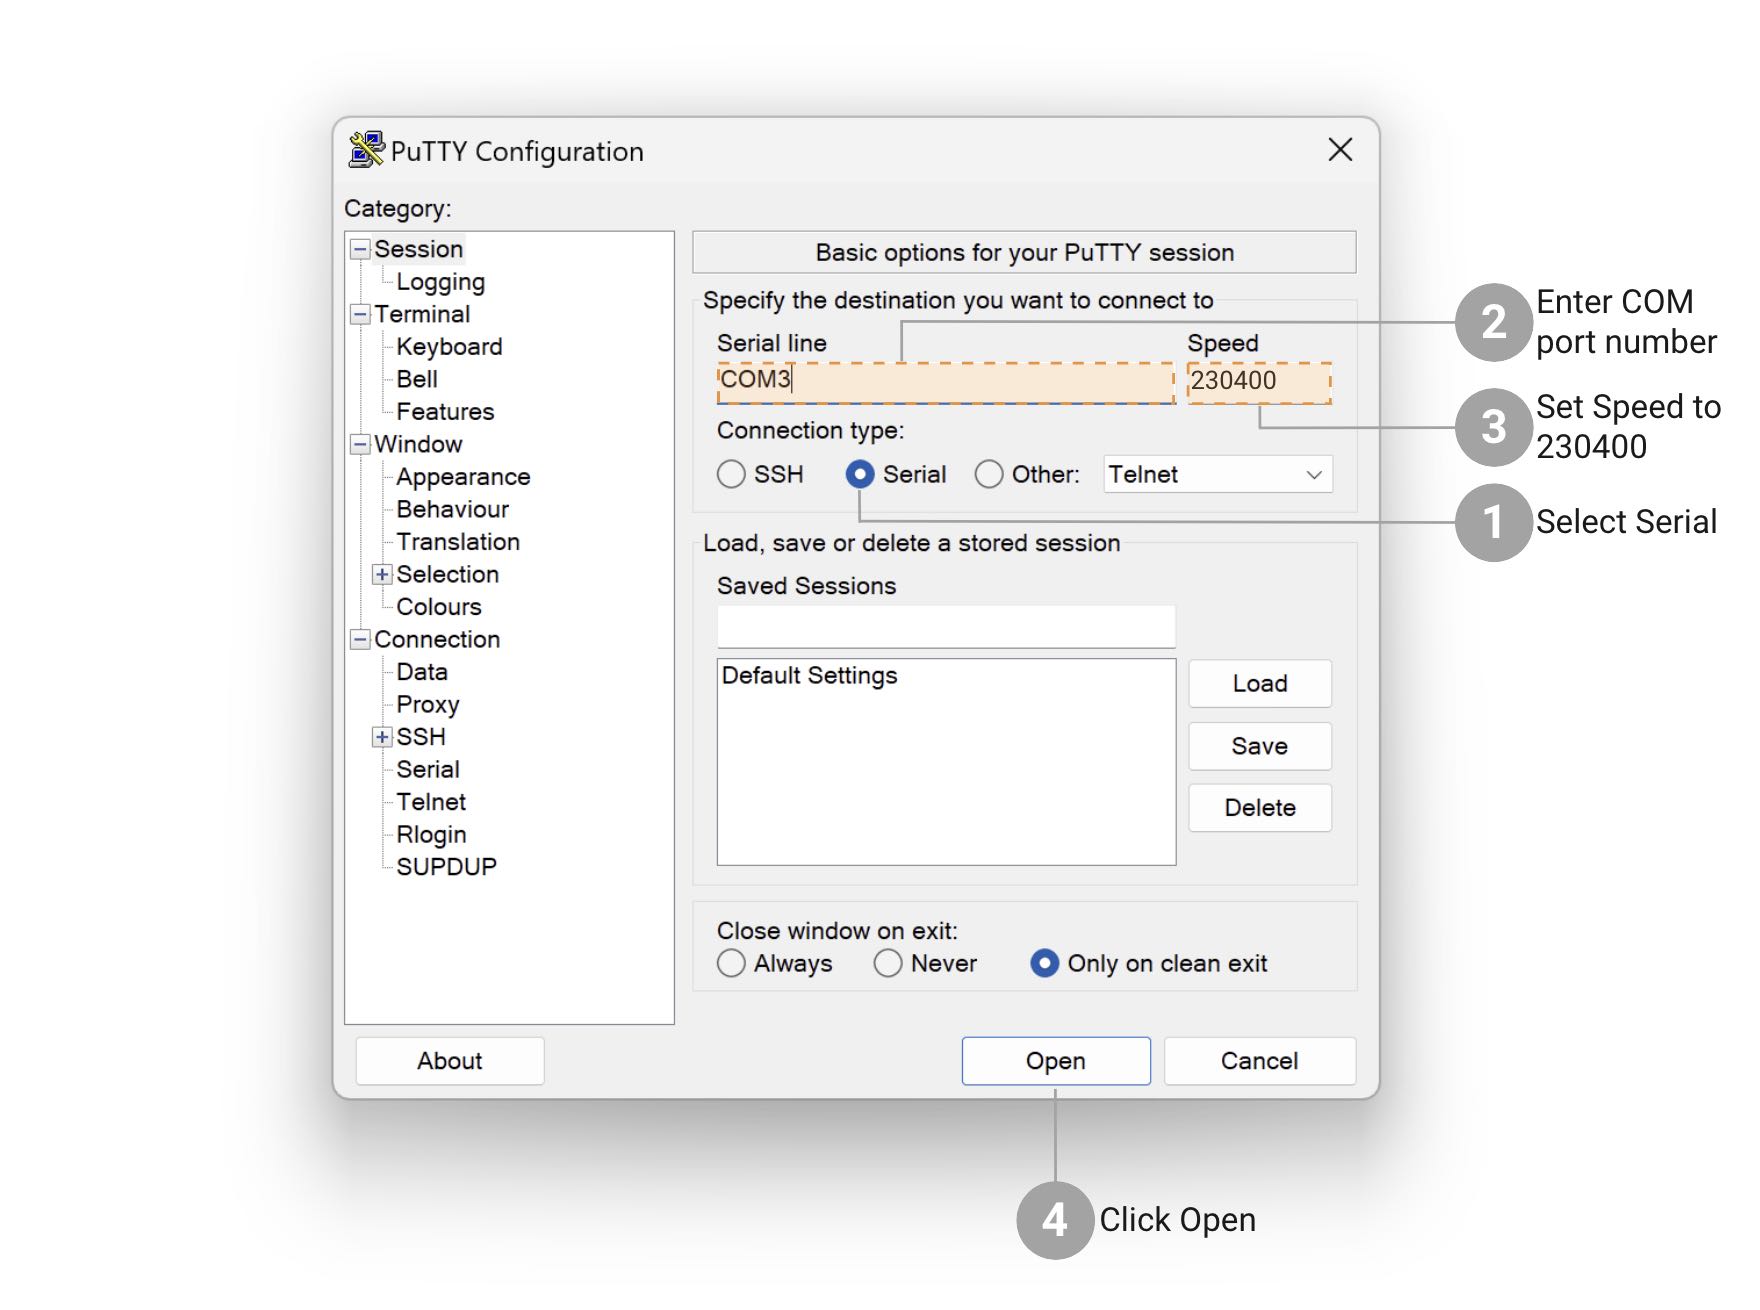
On Windows, do the following:

  1. On your computer, install the PuTTY application.
  2. Cold-plug the Developer Board into your Flipper Zero by turning off the Flipper Zero, connecting the developer board, and then turning it back on.
  3. Connect the developer board to your computer using a USB Type-C cable. Connect the developer board with a USB-C cable
  4. Find the serial port that the developer board is connected to by going to Device Manager -> Ports (COM & LPT) and looking for a new port that appears when you connect the Wi-Fi developer board. Find the serial port in your Device Manager
  5. Run the PuTTY application and select Serial as the connection type.
  6. Enter the port number you found in the previous step into the Serial line field.
  7. Set the Speed parameter to 230400 and click Open. Set speed to 230400
  8. View logs of your Flipper Zero in the PuTTY terminal window.
  9. To quit, close the PuTTY window.